

TrekPak: The Ultimate Guide
TrekPak is an excellent way to organise and protect your equipment. Learn how to kit out your Peli case with precision and style.
What is TrekPak?
TrekPak is a customisable pin and divider system to protect your equipment inside a Peli Case. Manufactured by Peli, it puts you in charge of how to divide up your case and organise your equipment. What makes TrekPak different from other case divider systems is its ability to be reconfigured. TrekPak is a reusable system, which means if your gear changes, your arrangement of dividers can change with it.
TrekPak began life back in 2012 as a successful campaign on crowdfunding website Kickstarter. Since then, it was released to the US where it quickly developed an enthusiastic response from case owners and was acquired by Pelican Products. In 2016 TrekPak was made available to Peli Case owners in the UK.
What is TrekPak made of?
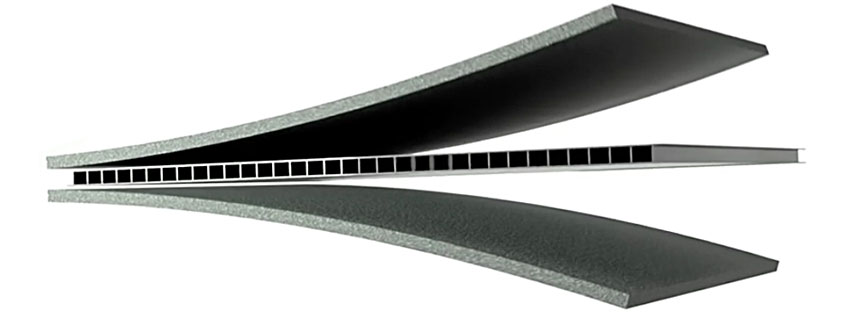
TrekPak dividers are constructed from a rigid corrugated plastic panel with waterproof foam laminated to both sides, resulting in a very strong divider that you'll find almost impossible to tear or shred. At barely a centimetre thick, it lets you form a grid of panels to protect your equipment without eating up valuable space. Being both tough and versatile, TrekPak is ideal as a long term solution to keep your gear safe for years.
What does a TrekPak kit contain?
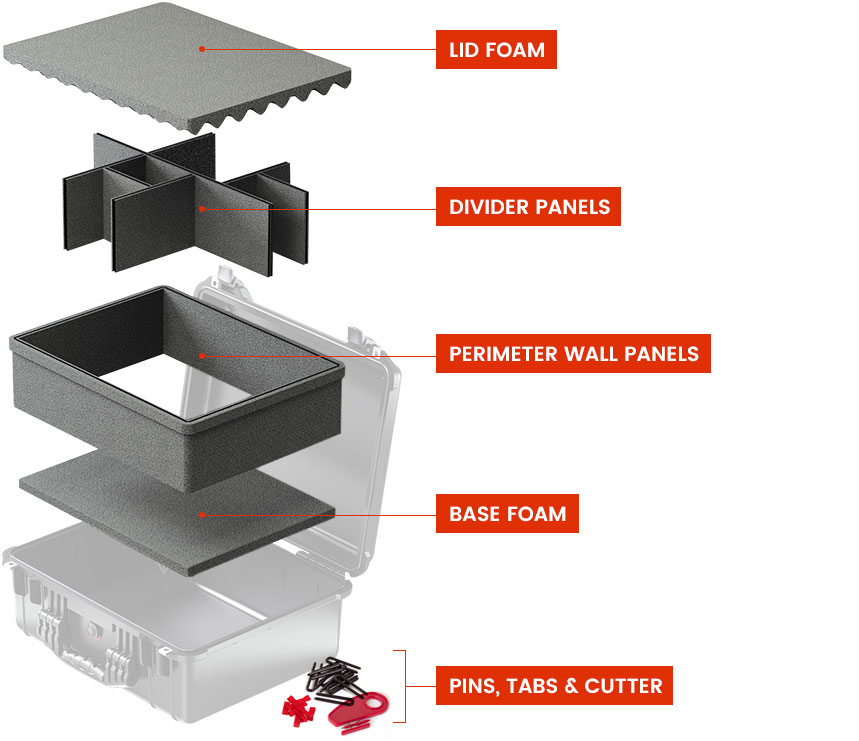
When you buy a TrekPak kit, it will typically come with a layer of convoluted foam for the lid of the case, a layer of base foam for the bottom of the case, perimeter wall panels, some divider panels (the number and length of which will vary depending on which case model it's for), a set of locking pins with red pull tabs and a TrekPak cutter tool. (The cutter tool, locking pins and divider strips can also be purchased separately if required.)
What makes TrekPak different?
Anyone familiar with a Peli Case will know that there are other interior options, the most popular being Pick N Pluck™ foam, a DIY solution that lets you shape the cavities for your equipment. This works extremely well for many case owners, however one limitation is that you can't make changes after you've 'picked n plucked' (or at least not without buying a new foam set). With TrekPak however, you can reconfigure the layout over and over.
TrekPak has an additional advantage, which is its strength. With repeated use, foam cavities can sometimes expand over time, gradually reducing the snug fit around your equipment. TrekPak is rigid and strong so cavities can remain largely the same as when they were first created.
Another popular interior choice for Peli cases is padded dividers and you might be wondering how they differ from TrekPak dividers. This can best be summed up in one word: precision. Padded dividers continue to be a great way to cushion your equipment inside a Peli Case and require no installation. TrekPak is more of a DIY solution that gives you much finer control over where to position the dividers and, in turn, how to arrange your equipment. You can also say goodbye to Velcro, as TrekPak uses a system of pins instead.
TrekPak dividers are thinner than regular padded dividers, freeing up more space for your gear. And as with the Pick N Pluck comparison, TrekPak comes with the added benefit of being able to change your layout over time.
Compared with foam and padded dividers, TrekPak may cost more upfront, but offers clear benefits over the other case interior options. TrekPak is best viewed as a long term investment that, thanks to its greater strength and versatility, should eventually pay for itself.
TrekPak Instructions
Installing TrekPak is straightforward. It uses a simple 'MEASURE-CUT-PIN' technique that will see your dividers installed in no time.
How to install TrekPak into a Peli case:
-
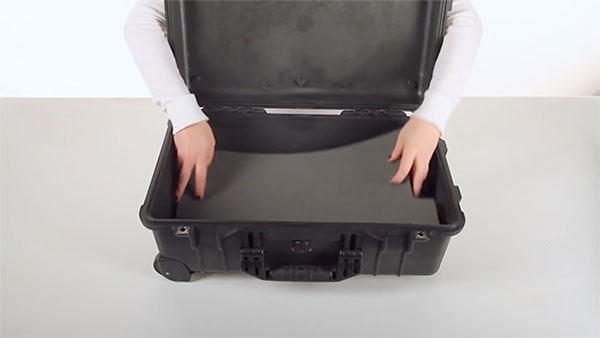
1) Open your case and insert the base foam and lid foam into your Peli case, gently pressing at the edges to secure them.
-

2) Insert the perimeter pieces next. This is what forms the protective wall around the interior of your case. The perimeter pieces will already be pre-cut to the shape of your particular model. (If you have a case with wheels, pay extra attention to how you insert the perimeter pieces because one side will have cutouts to fit around your case's wheel arches.)
-
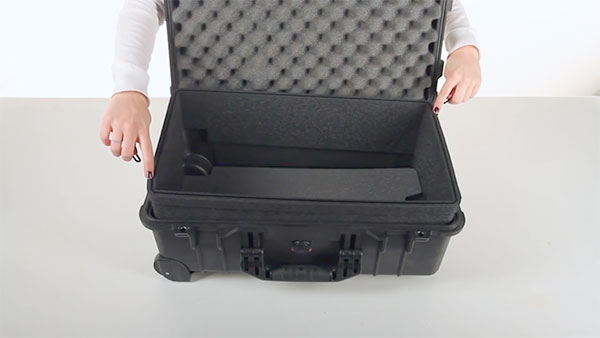
3) When both perimeter pieces are in the case, lock them together using a pin at both joins. Gently press down on the perimeter pieces until the raised bumper line on the outside hits the top of your case. To ensure an extra-snug fit, squeeze the edges of your perimeter while pushing down slightly.
-
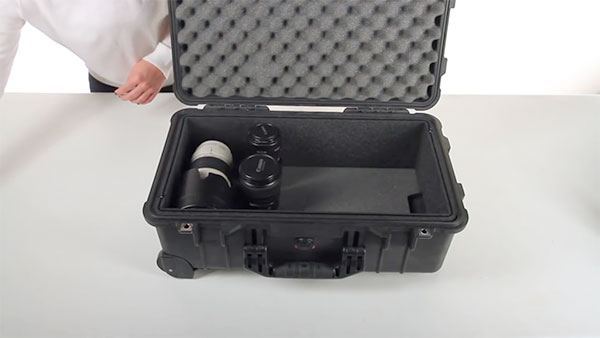
4) Add your items to the case, choosing a layout that makes good use of available space. You may want to think about which item you'll need access to most frequently when opening the case, and position this one at the front and centre. Remember, dividers will require a straight-line space running between adjacent items, so try to visualise this as you add your equipment.
-
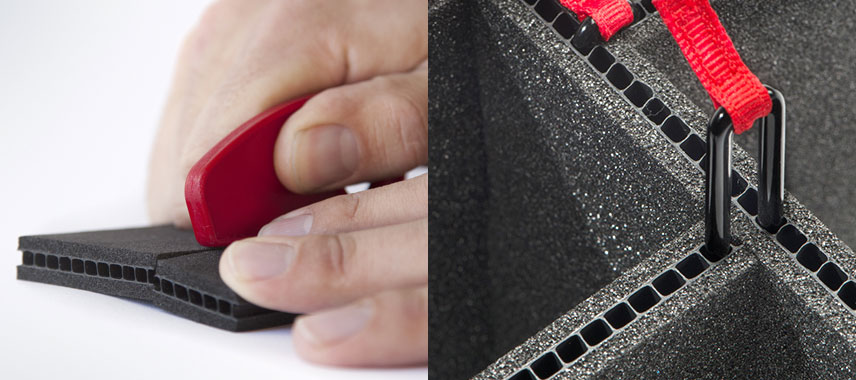
5) Measure your first TrekPak divider section by holding it alongside the perimeter of the case and seeing which flute (hole along its corrugated edge) touches the opposing wall. Insert the middle prong of your cutter tool into this flute.
-
6) Place the whole divider onto a flat surface, and with the divider held down with one hand, gently pull the cutter tool towards you. The cutter's middle prong and double blade should work nicely together to give you a clean, straight cut.
-
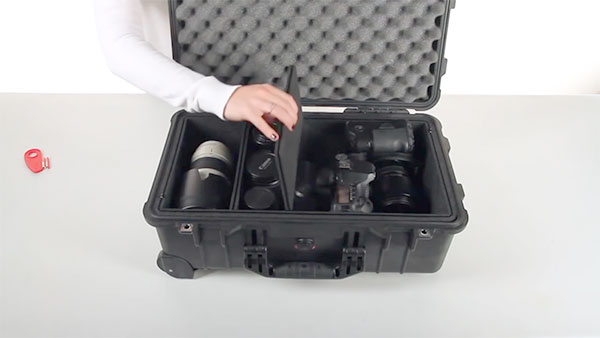
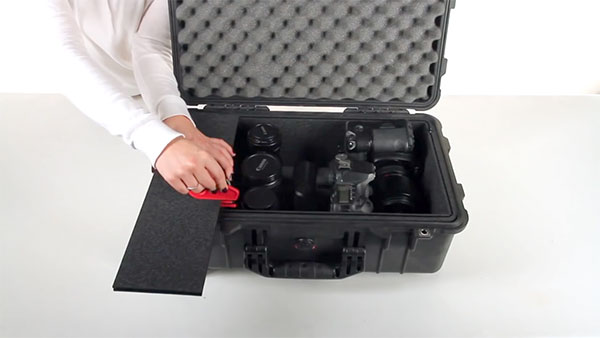
7) Place the finished divider section into the case, nudging it down to ensure that your equipment is snug but still able to be removed. Then repeat to create further divider sections as needed.
-
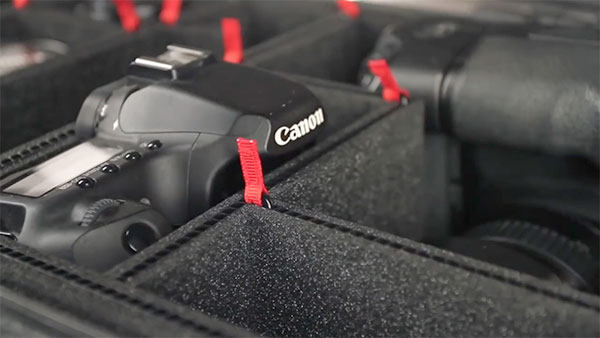
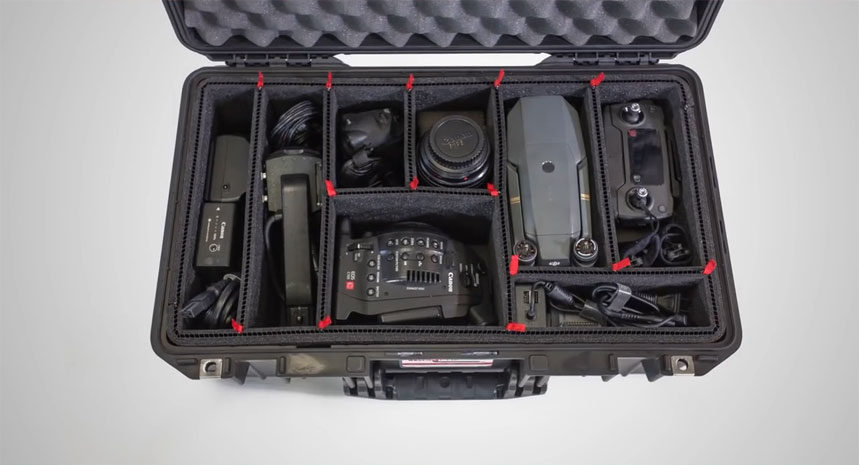
8) Attach the red pull-tabs onto your steel U-pins, and insert the pins into the divider foam cavities, connecting different divider sections together at each 'junction'. Don't forget to connect divider sections to the perimeter wall too.
Once your dividers are locked into place, you're done! If you change your mind after cutting a divider, extra divider material is included in your TrekPak kit. In the event that this has already been used up, you can buy standalone divider panels for many cases.
Below is a video that shows how to install TrekPak into the American equivalent of a Peli case. The method is exactly the same for a Peli case.
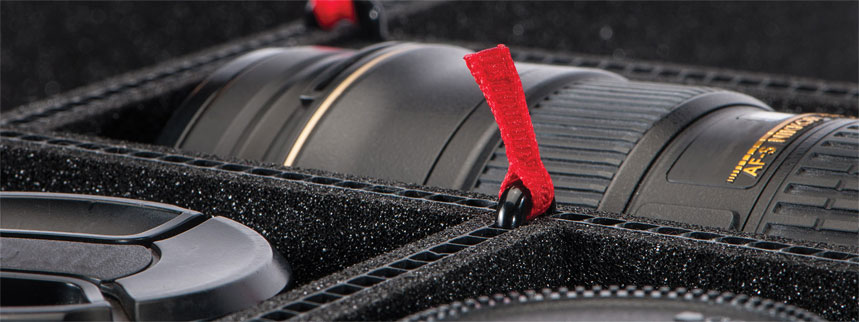
Protective Camera Case
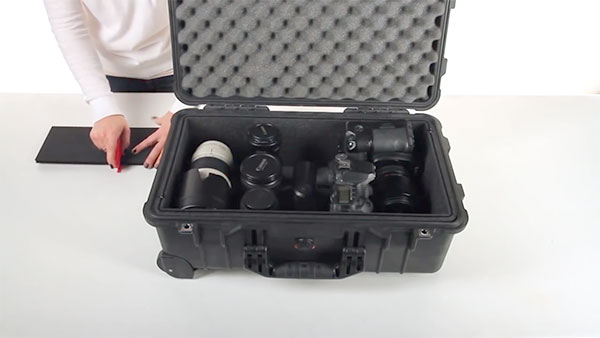
While TrekPak can be used for almost any equipment, it was created with photography in mind and is an excellent system for protecting and storing cameras, lenses, lighting and related accessories. The fact that dividers can be repositioned and adjusted at a later date makes it ideal for camera equipment as photographers tend to change and upgrade their gear over time.
The TrekPak system can be used for many other items too covering many different professions and leisure activities. If you have equipment that needs to be protected, stored and neatly organised inside a Peli case, TrekPak is a great solution.
Can TrekPak Be Installed in Any Case?
Currently TrekPak divider kits are available for some of the most popular models of Peli case from the Protector, Storm and Air range:
TrekPak for Peli Protector Cases
TrekPak for Peli Storm Cases
TrekPak for Peli Air Cases
In addition to complete TrekPak kits we also stock individual strips and accessories - see our full TrekPak range.
If you're in the market for a Peli case, remember to check its interior options before adding it to your basket, as you may be given an option to choose a TrekPak interior. If you already have a Peli case, check out the standalone TrekPak kits to see if one is available for your model.
Want more information?
Simply call us on 01275 866 366 Mon-Fri or click here for advice and a free no-obligation quote.